Wondering how to record a vendor refund in QuickBooks Desktop? You’ve come to the right place. Here we will guide you on how to record a refund from a vendor on a QuickBooks desktop according to various scenarios. Start with the procedure according to your matching case and record the refund you received from the vendor right away.
How to Record Refund from a Vendor in QuickBooks Desktop?
Case 1: Refund Check Sent By The Vendor For The Bill That’s Already Paid
Follow the steps below to learn how to enter vendor refund in your QuickBooks Desktop for the paid bill:
Step 1: Start with Recording the Deposit of The Vendor Check
- First of all, on your QuickBooks open the Banking menu.
- Now click on the Make Deposits
- On the next window, click on the drop-down menu and select Received.
- Now you need to select the vendor who sent the refund.
- Click on the Account drop-down and select the Payable account.
- In the given space in the Amount column, enter the among on the Vendor check.
- You can also enter the check number, memo, payment method, and class according to your choice.
- At last, once you are done filling in these details click on Save and then Close.
Also Read: QuickBooks Online Vs Desktop: Which One Should I Opt For My Business?
Step 2: Now Record The Refunded Amount’s Bill Credit
- Go to the Vendors menu and click on Enter Bills.
- Now click on the Credit radio button.
- Enter the name of the Vendor in the given space.
- Go to the Expenses tab and select the Accounts that are on the original bill.
- Enter the amount for each Account in the given column.
- At last hit the Save and Close button.
Step 3: At last, you Need to Link the Vendor Deposit to the Bill Credit
-
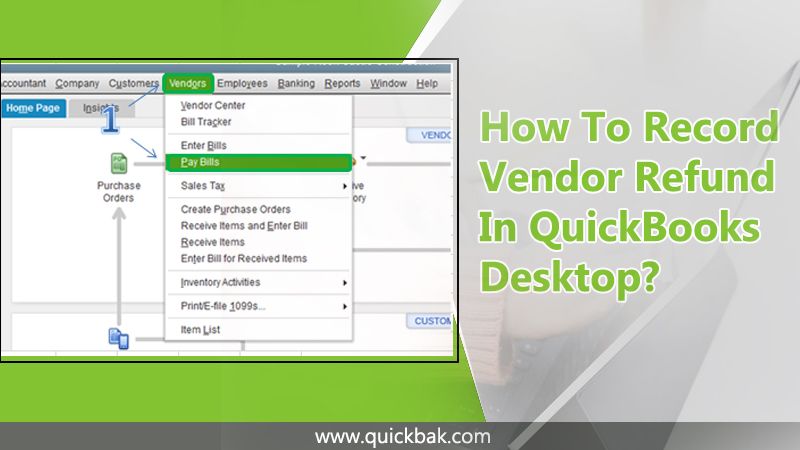
- Go to the Vendors menu and click on Pay Bills.
- Now select the Deposit that matches the amount of the Vendor check.
- Click on the Set Credits option and select the Bill credit you created above.
- Click on Done.
- Now you need to choose Pay Selected Bills and hit the Done button.
Case 2: Refund Received From the Vendor For Returning Inventory Items
To record a vendor refund in QuickBooks for returning items, the steps are as follow:
Step 1: Record the Check Deposit
- Open the Banking menu on your QuickBooks and click on Make Deposits.
- Select Ok if the Payments to Deposit window shows up.
- Now on the Make Deposits screen, click on the drop-down menu and select Received.
- The next step is to select the Vendor from whom you received the refund.
- Click on the From Account drop-down and choose the correct Account Payable
- Now you need to enter the amount of the refund check in the given column.
- Fill up the required details and click on Save.
- Select Close.
Step 2: Record the Returned Item’s Bill Credit
- Open the Vendors menu and click on Enter Bills
- Now hit the Credit radio
- Enter the Vendor name in the given space and go to the Items Tab.
- In the next field, you need to enter the return items with their amounts as mentioned in the checks.
- Click Save & Close to finish recording the Bill credit of the Returned items.
Step 3: Link the Vendor’s Deposit To the Bill Credit
- Go to the Vendors menu and click on Pay Bills.
- Now you need to select the Deposit matching with the check amount of the Vendor.
- Click on Set Credits and apply for the Bill Credit as you just created.
- Click on Pay Selected Bills and hit Done to finish.
Case 3: Refund Check Sent By The Vendor That’s Not Related to The Bill
Here’s how you can record a vendor refund in QuickBooks sent by the Vendor for the refund check that’s not related to the Bill.
Step 1: Record the Vendor’s Check Deposit
- First of all, you need to go to the Banking menu.
- Now choose to Make Deposits.
- Select the drop-down and click on Received.
- Select the vendor whose refund you received.
- Now select the From Account drop-down and choose the accurate Account Payable
- Enter the correct amount of the Vendor check in the Amount column.
- Fill up the remaining fields accordingly.
- Click on Save & Close.
Step 2: Record the Bill Credit of the Refunded Amount
- Open the Vendors menu and click on Enter Bills.
- Click on the Credit radio
- Fill up the Vendor’s name in the given space.
- Go to the Expenses tab.
- Select the Account you usually use for refunds. If you don’t know which account to use for a refund, ask your accounting professional.
- Now you need to enter the Amount for each Account in the given column.
- At last, click on Save and Close.
Step 3: Link The Refunded Deposit To its Bill Credit
- Again, you need to navigate to the Vendors menu and select the Pay Bills
- Choose the deposit matching the amount of the Vendor’s check.
- Click on Set Credit and apply the Bill credit to it as you created in the second step.
- At last click on Pay Selected Bill and hit the Done
Case 4: The Refund Check Sent By Another Vendor On The Behalf Of the Original Vendor
If the check is sent by a vendor other than the original sender, then you need to first create a deposit for that vendor before recording it. Here’s how to receive a refund from a vendor in QuickBooks other than the original vendor.
Step 1: Create The Deposit For the Vendor (The One Who Sent You the Refund Check)
- Navigate to the Banking menu on your QuickBooks.
- Click Make Deposits.
- Choose OK if the Payments to Deposit prompt appears.
- On the next screen, select the drop-down menu and click on Received.
- Now select the vendor from whom you received the refund check.
- Choose the Account Payable account in the From Account dropdown.
- Then enter the correct amount of the refund in the Amount field.
- Fill in the optional information accordingly and then choose Save & Close.
Step 2: Create A Bill For The Deposit Amount And Apply It
To create a bill for the amount of the deposit and apply it to the deposit follow the steps below:
- On your QuickBooks, select the Vendors menu.
- Click on Enter Bills.
- Enter the refund amount in the Amount Due
- Next, you need to choose a Wash Account/Expense Account in the Account field.
- Now enter the amount of the refund.
- Choose Save and Close.
- Navigate to the Vendors menu and click on Pay Bills.
- Choose the Bill and click on Set Credit.
- Choose the Credit and hit the Done
- Click on the Pay Selected Bills and then select Done.
Step 3: Now You Need To Create a Credit For The Original Vendor
- Open the Vendors menu.
- Click Enter Bills.
- Click on the Credit Radio button.
- Choose the Vendor who sent you the refund in the Vendor
- Enter the refund amount in the Credit Amount
- Go to the Expense tab.
- Select the account that was used on the original bill in the Account field.
- Enter the refund amount in the Amount field.
- Hit Save & Close.
Also Read: Why QuickBooks Won’t Print? How Can I Fix It?
Step 4: Create a Bill For the Amount Credit Affecting the Wash Account and Apply it
So now that you have performed the above steps, it's time to create a Bill for the Credit amount that is affecting the wash account. After that, you’ll be applying the Bill to the Credit. Let’s get started:
- Navigate to the Vendors menu and choose Enter Bills.
- In the Vendor field, you need to select the vendor, the one from whom you received the refund.
- Next in the Amount field, just fill up the refund amount.
- Go to the Expense tab
- Choose the Wash account in the Account
- Again fill-up the refund amount in the Amount
- Hit Save and Close.
- Open the Vendors menu again and click on Pay Bills.
- Choose the Bill and click Set Credit.
- Choose the Credit and then click on Done.
- Click on the Pay Selected Bills option and then click Done.
Case 5: The Refund is Sent As A Credit Card Credit By The Vendor
Record the vendor refund in QuickBooks sent as a Credit Card Credit by following the steps below:
- First, you need to select the Banking menu on your QuickBooks.
- Click on the Enter Credit Card Charges
- Click on the Credit card drop down and choose a credit card account.
- After that Click on the Refund/Credit radio
- Enter the Vendor's name.
- Now fill up the necessary details that include the Data, Ref No, and the Amount.
- Fill up the Memo describing the transaction properly.
- If the refund you received is for some returned items, then go to the Item tab. Enter the items and the refund amounts.
- In case the refund is not received for returned items then just go to the Expenses tab. Choose the correct Accounts and fill up the Amount.
- At last, choose Save & Close.