QuickBooks is one of the finest accounting software widely utilized for handling small and medium-sized business finances. It is prominent for its smooth way of tackling transactions, bookkeeping, records, billing statements, and various other accounting activities. Though QuickBooks has several astonishing features, it doesn’t mean that it is immune to any technical glitches. Yes, there are a couple of errors which can come across and interfere in your work operation. A common error that users most often face is QuickBooks Error Code H202. But for non-tech, it is quite difficult to get it fixed from the root. That’s why; we describe every possible aspect of this particular error in this blog. So, make sure you read carefully from top-to-toe to learn the exact fixing methods.
How Does QuickBooks Error Code H202 Appear?
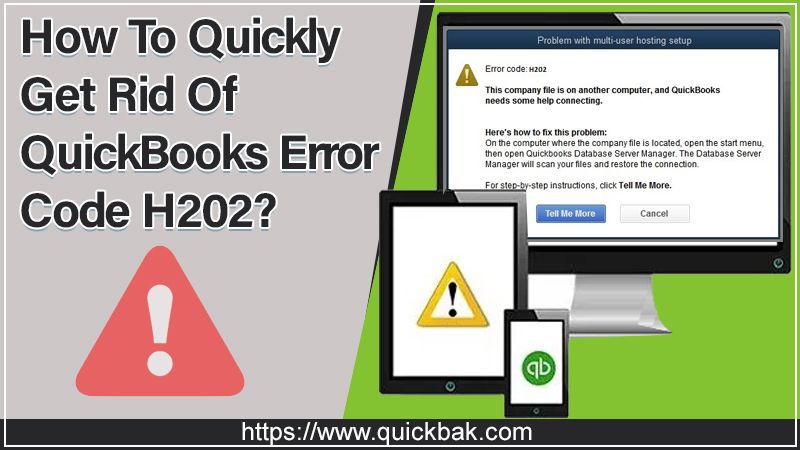
When there is a problem with a multi-user hosting setup file, the QuickBooks Error Code H202 arises. In other words, it happens when you attempt to open a QB company file that is stored in another computer. And thereafter, the copy of QuickBooks won’t be able to reach that server. Furthermore, you may receive the following message while accessing the QB file in a multi-user mode:
“You are trying to work with a company file located on another computer and the copy of QuickBooks won’t reach the server of that computer”. And thus this is QuickBooks Error Code H202.
Symptoms Of QuickBooks Error Code H202
Here is the list of signs that identify the Error Code H202 QuickBooks:
- Operating Windows may freeze.
- Your PC may get inactive.
- You can’t toggle the multi-user mode.
- You can’t access the company file on another computer.
- The Error Code H202 will be spontaneously thrown on the computer screen.
Also Read: How To Fix QuickBooks Error 6190 And 816 In A Few Seconds?
Reasons For The Instant Occurrence Of QuickBooks Error Code H202
Checkout the list noted below to know the actual reasons behind appearance of QuickBooks Error Code H202:
- Hosting/Server Settings incorrectly configured which usually causes QuickBooks Error Code H202 Port Not Available
- The Firewall Software may be blocking the exchange of data between QuickBooks and the server.
- Most probably, the host’s or server’s IP address is not available to QB Desktop.
- QBCFMonitor and QuickBooksDBXX services might not be running on the server computer and hence throws QuickBooks Error Code H202.
- There is a possibility of having issues with the QuickBooks Database Server Manager.
- More often it arises due to damaged or corrupted .ND files.
Different Methods To Resolve QuickBooks Error Code H202
If you experience QuickBooks Error Code H202 while switching your hosting server into multi-user mode, don’t worry! Here is a one-stop supporting solution for you. We have compiled numerous solving methods that will proactively help you to resolve it. Let’s follow one-by-one until your problems gets sorted out completely from the root:
Solving Method 1: Give a Check To Your Network Connectivity
Perform the following steps to ping your server:
- First, open Windows Search bar and type “Run” into the dialog box to evoke Run Window.
- Next, type cmd in the search field and hit “Enter”

- Now, enter the name of your server and then press the “Enter” key from your keyboard.
If you notice packet loss or getting a delayed reply, it means there is a network connectivity issue. The network issue has to be repaired soon. In such circumstances, move to the next solving guide.
Solving Method 2: Add Server To The Windows Host File
Here’s the complete procedure to do so:
- First, go to the Windows Host file on your computer where the error is
-(C:\Windows\System32\Drivers\Etc\) in the notepad. - If it is necessary, open the notepad as admin.
- After the last IP address, keep the insertion point and type the server’s IP address.
- Now, press the “TAB” key once on your keyboard and then write the server name.
- After that, go to the “File” menu to select the “Save” button to save your server.
- Thereafter, click the “Exit” button to end the process.
- Now, again attempt to open the QB company file to check for the Error Code H202 QuickBooks.
- If the same error code is still appearing, proceed to the next solving guide.
Solving Method 3: Use The QuickBooks File Diagnostic Tool
In order to rectify QuickBooks Error Code H202, use the diagnostic tool of QB. Here’s how:
- First, download and install QuickBooks Diagnostic Tool on your PC.
- After that, go to the folder where the data file is saved.
- Next, write down the IP address and Network Interfaces
- Verify the “Firewall Status” section whether it has the “Open Ports” button. If it is really so, give a single tap on that button and allow the ports for QuickBooks.
- Afterward, let’s check for data connectivity.
- Now, make an attempt to open your QB company file to ensure if the error code H202 has been solved.
If the same issue persists, move to the next solution method.
Solving Method 4: Create A New Folder For Your Company File
Go through the following instructed steps for the same:
- First, create a new folder on the hosting computer.
- Now, share the folder to the host computer and set it up accurately. Once it’s done, you will be prompted to give permission in terms of sharing the company files.
- Now, copy the QuickBooks Database file (QBW) and paste it to a new folder.
- In the end, let’s make an attempt to open the company file in the multi-user mode.

In case the QuickBooks Error Code H202 remains, move to the next solution.
Solving Method 5: Verify QuickBooks Hosting
If an error is with the QB hosting that’s accessed in multi-user mode, the Error Code H202 QuickBooks may happen. Here’s the right ways to rectify it in a very shorter period:
- First, launch QuickBooks Desktop on your hosting computer.
- Thereafter, navigate to the “File” menu and then select the “Utilities” tab.

- Afterward, check-out the list of “Host Multi-User” to Access it. Make sure the system is hosting the file. If the system is not hosting the file, move to the next system. Note: Do not do anything on your workstation during this process.

- If you see “Stop Hosting Multi-User Access”, immediately select it.

- Now, you will have to ensure that the company file must be closed.
- Once you are confirmed about it, tap “Yes”.
If QuickBooks Error Code H202 remains unsolved, proceed to the next solution.
Solving Method 6: Restart QB Database Server Manager
Here’s the complete guideline to do so:
- First, evoke the Run dialog box from Windows Search.
- Then, type “services.msc” into the search field and then click the “OK” tab.
- Afterward, place a right-click on QuickBooksDB19 (2009), QuickBooksDB18 (2008) or QuickBooksDB17 (2007) and choose the “Stop” option.
- Now, give a right-click again and then select “Start” to change its status from stop to start.
- Once you are done with it, close the Window.
- Next, let’s show the extensions for known file types.
- Give a right-click on the “Windows Start” button and then choose the “Explore” tab.
- Then, go to “Tools” > “Folder Options”.
- when it’s done, click on the “View” tab.
- Afterward, clear “Hide Extensions” for the known file type’s box.
- Once again, click on the “View” tab and choose the “Show Hidden Files and Folders” tab.
- After that, Click on the “Hide Protected Operating System” file’s check-box to clear it.
- After that, click “Yes” if a warning message appears and then tap the “OK” button.
- Now close the Windows Explorer by clicking on the “X” sign.
Let’s move to the next solving procedure if your problem is unsolved yet.
Also Read: How to Quickly Fix QuickBooks Won’t Open issue?
Solving Method 7: Eradicate And Recreate the .ND File
Let’s do it with the following instructions:
- In the Windows search box, type *.ND and then hit the “Enter” key from your keyboard.
- Now, in the next pane, put a right-tap on the .ND file and then click the “Delete” button
- When prompted, click “Yes” to confirm the deletion. In a couple of seconds the selected file will be really eliminated.
- Now, press the Windows logo key.
- Navigate to All Programs > QuickBooks > QuickBooks Database Server Manager.
- Click on the “Scan Folder” tab.
- Then, click the “Add Folder” button and then search for the company file folder.
- After that, choose the company file and click OK. The path to the company file is presented in the Folders with QuickBooks Company files filed.
- Click the “Start Scan” button to begin with the scanning procedure.
- When scanning process ends, click “Close” to close the opened Window.
Still The QuickBooks Error Code H202 Occurs? Dial The Helpline Number
Isn’t the proffered information beneficial for you to troubleshoot QuickBooks Error Code H202? Looking for alternative methods to solve this particular error issue? Simply, place a call on the given helpline number. Our tech-geeks will answer your call and lend you a hand to dissolve this issue in a minute. Call us and stay tuned hassle-freely!