Now and then you need to make a backup of your QuickBooks Company file. This will ensure that you have a recent copy of your important accounting records such as templates, reports, invoices, bill payments, monthly receipts, payroll documents, etc. So, if you run a small or medium-sized business, safeguarding your financial information is extensively crucial. Therefore, creating a QuickBooks Backup File is always a good idea as it prevents you from losing even an inch of your data. In this tutorial, you will learn the relevant procedure to successfully back up your QuickBooks Company file. So, simply continue to read!


Benefits Of Creating A QuickBooks Backup File

The Computer system can be infected with virus threats or other malware functions such as spyware, keyloggers, Trojans, or ransomware. This can harm your PC and hence you could potentially lose access to all your data. But, when you regularly backup QuickBooks data or your Company files, you can hassle-freely restore it. Therefore, making a QuickBooks Online Backup daily basis significantly reduces the chances of your accounting information falling into wrong hands or being corrupted and misplaced. All your crucial financial records will be safe and secure. In a very short span, you can get back to your work even after running into a system corrupt or is affected by the virus.

Hence, avoiding data loss is the major advantage of taking a backup of your file in QuickBooks.


Also Read: How To Record Vendor Refund In QuickBooks Desktop?


Save a QuickBooks Backup File Before You Start To:

  •       Uninstall the QuickBooks software
  •       Import any data
  •       Shift the QuickBooks application from one computer to another


Step-By-Step Guidelines To Create QuickBooks Backup File

Beneath, we will show you how you can proactively and trouble-freely make a QuickBooks Online Backup of your accounting data. Thus, stop wandering now! Simply, feast your eyes on the below-guided instructions and implement them.


Guideline 1: QuickBooks Backup File Manually

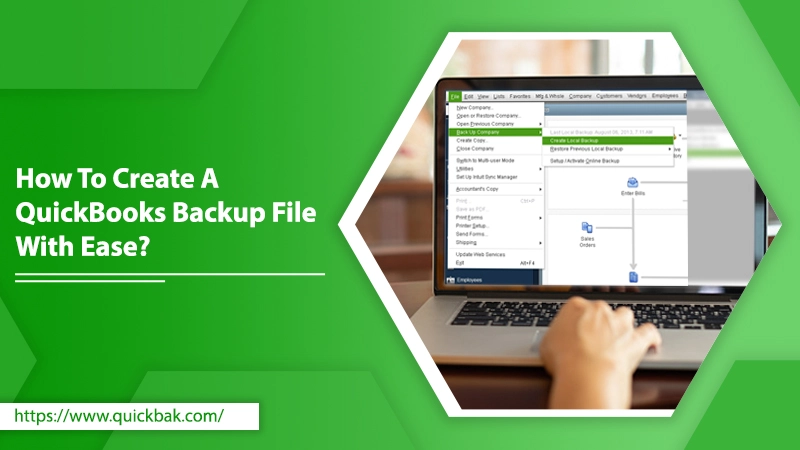
To manually backup your QuickBooks Company file, go through the below-noted steps:

  • First and forecast, you have to launch QuickBooks on your Windows PC
  • Next, if you are not already logged in, provide the correct credentials to log in to QuickBooks in single-user mode.
  • Afterward, go to the “File” menu and select the “Back Up Company” option.
  • Thereafter, give a single click on the “Create Local Backup” tab and select “Local Backup.”
  • Next, click “Options” and select the exact location where you want to Backup Company File QuickBooks Desktop. It’s best to store it on an external hard drive or online.
  • To choose where to save your backup copies, simply click on the “Browse” tab and then select the location as per your convenience.
  • After selecting the location for your backups, click the “OK” button.
  • Then, press the “Next” button.
  • Now, the process of backing up your QuickBooks data has begun.
  • Click the “Save It Now” button and finally, tap the “Finish” tab to begin the backup process.
  • Depending on the size of your Company file, the time will be taken to finish. Usually, it takes a couple of minutes to end up the backup process.
  • During the QuickBooks Backup File process, do not turn off your operating device otherwise the backing up task will be intervened in the middle.
  • After successful completion of your data backup process, a confirmation message pops up. You can however also see the new location where the QuickBooks file has been backed up.

This is how you can back up Company File QuickBooks Desktop manually.


Guideline 2: QuickBooks Backup File Automatically

There are generally two genuine methods to back up your company file in QuickBooks. The first method is to create a backup each time you close the file. You only have to set the frequency of how often QuickBooks has to back up the file. Howsoever, QuickBooks stores the backup file on your hard drive under the QuickBooks directory in a folder named “Auto Backup”.

The second method is to schedule an unattended backup. This means you don’t need to be working in QuickBooks, or even operate your computer. This backup file can only be saved on a local or network hard drive. The company file must be closed during a scheduled backup.

Here’s how you can use both methods to efficiently create a QuickBooks Automatic Backup file. Let’s have a glimpse!


Method 1: Backup When Closing File

The accurate series of procedures to back up automatically while you close a file is enumerated underneath:

  •       First, launch QuickBooks and log in to your account if you aren’t already logged in.
  •       Then, go to the “File” menu and choose the “Back Up” tab.
  •       After that, place a click on the “Schedule a Backup” tab.
  •       Click the “Automatically back up when closing data file every” box to select this option.
  •       Mention the appropriate backup frequency.
  •       Now, make appropriate selections in the “QuickBooks Backup” windows.
  •       Finally, hit the “OK” tab.


Method 2: Schedule Unattended Backup

Here’s how to do so in a quick way:

  •       First, launch your QuickBooks application.
  •       Then, go to the “File” menu and choose the “Back Up” tab.
  •       Click the “Schedule Backup” tab.
  •       Click the “New” button.
  •       Make an appropriate selection in the “Schedule Backup” window.
  •       In the end, click the “OK” button to save the new schedule QuickBooks Backup File

Implementing any of the above methods will let your Company file be automatically backed up. Even though, at any point in time, if your mind is changed and you no longer want to create an automatic backup, you can turn it off. We’ll show you how!


Steps To Disable Automatic Backup

  • First, open the “Settings” section.
  • Select the “Back up company” option.
  • Note: You probably have to sign in with Intuit and then select the “Authorize” tab to proceed.
  • Now, locate the company file with the automatic backup you want to turn off.
  • Select the “Action” option from the dropdown menu.
  • And then, click the “Disable backup” tab.


Save Your QuickBooks Backup File To Google Drive or Dropbox

You can save your QuickBooks Backup Company File to Dropbox or Google Drive when you link your account. Here’s the step to do so:

  • Go to “Settings”
  • Now Select “Back up company”.
  • After that Select the “Local backup” menu.
  • Select “Link a Service”.
  • Choose where you want to save your backup. Select either the option of “Link Google Drive” or “Link DropBox”.
  • Follow the steps to allow QuickBooks to finally create a backup of your data.


How To Restore Your QuickBooks Data From Backups

Once you have a backup copy of your QuickBooks Company file, you can restore your file anytime. The stored file has a .qbb extension at the end of the file name. Check out the below-noted points if you want to regain your QBs data with no effort.


Ways 1: Restore QBs Backup From A Local File

The comprehensive procedures of getting back your QuickBooks Cloud Backup from a local file are quite simple. Follow the below-noted steps one by one:

  • First, you have to open QuickBooks.
  • Now, go to the “File” menu.
  • Then, navigate to “Back Up Company” => “Restore Previous Local Backup” => and select the particular file to restore.
  • Now, you are required to follow the on-screen prompted guides and make sure to restore the backup copy.
  • You can type “Yes” to permanently delete the current data.


Ways 2: Restore QBs Backup From An Online Copy

Here’s the stepwise procedure to recover backup efficiently from an online copy. Just, go through them:

  • Go to the “File” menu in your QuickBooks account.
  • Select an option of “Open or Restore Company.”
  • Place a click on the radio button to select “Restore a backup copy” in the open window.
  • Press the “Next” button.
  • Further, in the next window, you will be asked to back up the copy stored locally or online.
  • You have to select the “Online backup” option by clicking on its radio button.
  • Afterward, press the “Next” button.
  • Afterward, you’ll be landed on the Intuit Data Protect service pane to select the file in the cloud for QuickBooks Cloud Backup data.


Also Read: How To Download QuickBooks Install Diagnostic Tool With Easy Steps?


How To Check When Your Company File Last Backed Up?

If you want to see when you last backed up your QuickBooks Company file, you need to go through the following steps:

  • Launch QuickBooks
  • Go to the “File” menu
  • Hover over the “Back up Company” option
  • The time and date will appear on the screen at the top of the menu


What If Something Went Wrong? Dial 24x7 Online QuickBooks Support Number

Well, you might have noticed how much it is crucial to have a copy of all your accounting data. The top-to-toe instructions are provided above for creating QuickBooks Backup File, saving the file in the desired location, and restoring data after converting QBs Desktop to QBs Online. If you still fail to backup your data in QBs, contact our tech specialists via the round-the-clock QuickBooks Support helpline number. The top-most technician will assist you in a cost-effective manner to get your nasty problem resolved.